Julie's Yarn Blog
Find us on
  • My Blog
    • Knitting & Crochet
    • Dyeing & Spinning >
      • Color Wheel
    • FREE Dyeing Recipes >
      • Kool-Aid Dyeing
      • Onion Skin Dyeing

Turbulent Waves Pattern Errata

5/14/2020

0 Comments

 
We are all human and sometimes mistakes happen. If you find a mistake, let me know and I'll try to fix it if I can.
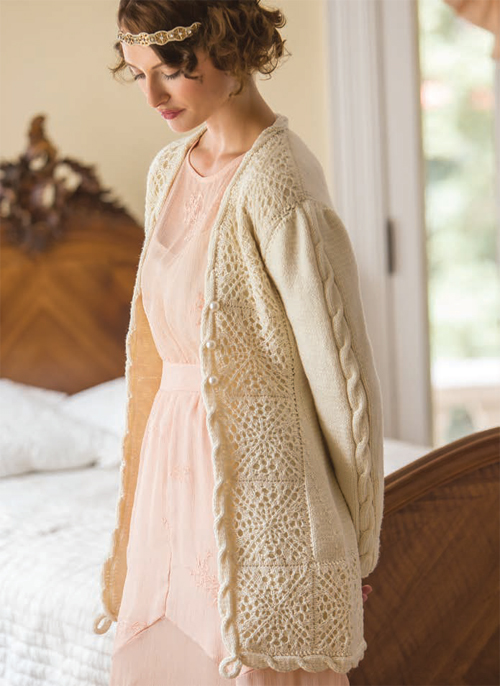
Turbulent Waves Scarf:
Short-row 1 should read: Knit to second marker, turn.
Short-row 2 should read: yfwd, sl 1 st pwise, take yarn over ndl to back, k to m, turn...
Short-row 3 should read: yfwd, sl 1 st pwise, take yarn over ndl to back, k to m...

For those of you who are having difficulty visualizing this, I found this video which will walk you through the steps. She does use slightly different terminology, but the steps are the same. She holds her yarn in the left hand.
Or, if you prefer to watch someone who holds her yarn in the right hand, try this video instead.
0 Comments

Blocking crochet

4/5/2017

2 Comments

 
Picture
I have to admit that I have a soft spot for hand-made doilies. Yes, I know they are old-fashioned... but maybe I'm a bit old-fashioned at heart.
Have you ever crocheted some beautiful lacy item, but when you're done it doesn't look at all like the lovely photo which inspired you to begin crocheting in the first place?
It can be rather disappointing.
Let me walk you through the steps using a lovely doily my grandmother made me about 10 years ago.
(She makes me them because she knows I love them. Isn't she so talented and sweet?)

Picture
Picture
Step One: Gather your gear. You'll need a lot of T-pins (also called blocking pins) and a surface that you can stick them into. I use my ironing board for smaller items. Don't forget your doily!
Step Two: Spread out the pattern and see if there are certain repeats or quadrants that you can use. This one has 8 pointy diamond shapes, so I divided it into quarters. This will allow me to keep it relatively even as I pin.
I will then divide each section in half. Then each of those sections will be divided in half again.

Picture
Picture
Step Three: Once the doily is pinned out roughly, I will focus on each individual flower cluster at the tip of each pointy bit. Doesn't that look better already?
Step Four: Now that the shape is beautifully pinned out, it's time to iron. Ok, so there might be a tea break between photos. It's a lot of pinning!
I set my iron just before "really hot". It's almost at the cotton setting. My iron has a steam button, which I use to puff hot steam onto the doily as I iron.
Now - and this is important - I leave my doily pinned to the ironing board to cool down (while I have some more tea).

Picture
2 Comments

And the winner is...

4/6/2016

0 Comments

 
I made the draw on April 5th, and the winner is (drum roll please) Cherlyn.

Cherlyn commented, "Congratulations on 5 years! That's a whole hand! Your shop is gorgeous, your wool is gorgeous and you my dear, are gorgeous as well. If I won, I would try the felting wool! ❤ "

You get to pick between these 2 lovely prizes.
Picture
Picture
Option 1: The yarn is Julie's Hand Dyed - aran weight, a package of buttons (your choice), and a stitch marker (your choice).

Option 2: A Silk/merino blend scarf blank, 3 packages (1 oz. each) of Merino felting fiber (your choice of colours), and three felting needles.

I had such fun picking out the prizes!

0 Comments

Happy Birthday!!!

3/14/2016

26 Comments

 
Picture
It seems like it was just a short while ago that I was scraping wallpaper, and fixing the walls - racing against the calendar - to open my own yarn shop.
Five years! I still wonder how time flew by so quickly.

I think it's the perfect time to celebrate. I am going to give away Prizes!
Picture
I have 5 prizes to give away! (I think I'll go with 5 as a theme)
The first prize will be given away on Tuesday April 5th. To win, all you have to do is comment below and tell us what you would love to win.

26 Comments

Reverse Stockinette Stitch

3/7/2016

0 Comments

 
I am frequently asked, "What is reverse stockinette? How do I knit this stitch?"

Well, I am happy to tell you that you probably already know how to knit it. If you know how to knit stockinette stitch (abbreviated st st), you're doing it.

                                                   Flip over your knitting!

The wrong side is now the right side. Which is why it has the name reverse stockinette as its name.
Picture
Ok, for those who are lost and have no idea what I was just saying, I'll break it down for you.

You will need to know the knit stitch and the purl stitch.

On row 1: Purl all the stitches
On row 2: Knit all the stitches
Keep repeating these two rows. 

The bumpy side is the right side of the fabric and the smooth side with "V's" is the wrong side of the fabric.

Here's a little video to help out the visual learners

0 Comments

Christmas Fox Ornament

12/16/2015

1 Comment

 
Picture
photo courtesy of Sahra Courtney
It has been a really busy year and I haven't had much chance to do anything let alone blog. Anyway, I would like to give all of you a little Christmas gift. So here is my Fox Ornament pattern. It is a bit tricky - just like this cutie.

Fox Ornament

You will need:
fingering yarn (sometimes referred to as sock yarn) in various colours: green, orangey-brown, white, blue, black
(I used a mix of different yarn that were left-overs from other projects.)

Needles: 2.25 mm (US 1) a set of 5 double-pointed needles (feel free to use circular needles if you love those)

Cast on 8 stitches (sts), join in the round without twisting the sts. Place marker at beginning of round and slip it each time you come to it.

Rnd 1: *Make 1, knit 1* rep to end of rnd = 16 sts
Rnd 2: Knit
Rnd 3: *Make 1, knit 2* rep to end of rnd = 24 sts
Rnd 4: Knit

Rnd 5: *Make 1, knit 3* rep to end of rnd = 32 sts
Rnd 6: Knit

Rnd 7: *Make 1, knit 4* rep to end of rnd = 40 sts
Rnd 8: Knit

Rnd 9: *Make 1, knit 5* rep to end of rnd = 48 sts
Rnd 10: Knit
Rnd 11: *Make 1, knit 6* rep to end of rnd = 56 sts
Rnd 12: Knit
Rnd 13: Refer to the chart to see which colours to use as you knit this row:
*Make 1, knit 7* rep to end of rnd = 64 sts.
Picture
Knit rnds 14 to 26 referring to the chart for colours.
I simply knitted with green (or blue) and brown. Then I used duplicate stitch to put in the white and black. Oh, and I knitted over the white squared with blue because it is easier to work white over the blue than over the brown. Tricky, tricky!

Rnd 27:  Refer to the chart to see which colours to use as you knit this row:
*Knit 6, k2tog* rep to the end of the rnd = 56 sts.
Rnd 28:  Refer to the chart to see which colours to use as you knit this row: Knit
Rnd 29: *Knit 5, k2tog* rep to the end of the rnd = 48 sts
Rnd 30: Knit.

Work any duplicate stitches, and stuff half the ball before continuing.

Rnd 31: *Knit 4, k2tog* rep to the end of the rnd = 40 sts
Rnd 32: Knit
Rnd 33: *Knit 3, k2tog* rep to the end of the rnd = 32 sts
Rnd 34: Knit
Rnd 35: *Knit 2, k2tog* rep to the end of the rnd = 24 sts
Rnd 36: Knit

Stuff remainder of the ball.


Rnd 37: *Knit 1, k2tog* rep to the end of the rnd = 16 sts
Rnd 38: Knit
Rnd 39: *Ktog* rep to the end of rnd = 8 sts

Cut the yarn and pull the tail through the 8 sts twice. Poke the yarn through the entire ball and cut off on opposite side.

Make a pretty hanger with a piece of ribbon about 12 inches long. Stitch it in place at the top of the ball.


1 Comment

Downton Abbey

1/6/2015

1 Comment

 
Picture
I hope your holidays were truly wonderful and Happy New Year!

Life is always busy around here. I have two new mitten patterns and a wrist warmer pattern waiting to be published that should be available soon. I am always so much more productive when the winter snow lies thickly outside my window.

Did you watch the new instalment of Downton Abbey? I did, and I was, once again, engrossed! I find the characters so engaging (I’m particularly fond of the cook and Mr. Bates and Anna); I know I’ll be glued to the TV on Sunday nights for the rest of the season.

I recently had the opportunity to show off my LacyTapered Jacket in the Guardian. You can read about it
here (and watch a video clip of how I go about getting something like this done).

I also wanted to let you know that Interweave Press is running a special promotion on digital  issues of Unofficial Downton Abbey Knits 2014. I’m including a link to the issue from the Interweave Store and a coupon code for 20% off on this issue (active January 8-16). Store link:
www.interweavestore.com/the-unofficial-downton-abbey-knits-2014-grouped

Coupon code (active 1/8-1/16): DOWNTON20

1 Comment

My Name in Print!

9/25/2014

2 Comments

 
Picture
I have been in an agony of suspense for ages. It all began when I submitted a sweater design to a magazine company Between Christmas and New Year (2013). Magazines have pretty strict rules and you can't call them up every few weeks to find out if they've seen your design or are considering it etc.

I decided to give up on the whole thing as February slipped past around and I had still not heard anything back from them. Then in March I got an exciting e-mail letting me know that my design had been selected! (YAY!!!)

...Oh and I had until April 15th to get the sweater and the written pattern to them...

Well, now you know why my blogging is so erratic! I really didn't do anything but knit all March. The kids were very good and didn't ask for anything and my husband quietly did the everyday chores like laundry and dishes without me having to ask.

The sweater was sent in and the pattern was written up and e-mailed off in time. Whew!

Then for the hardest part ... I was not allowed to tell anyone until the magazine was published!


Picture
Photo credit Joe Hancock Photography
Picture
Photo credit Joe Hancock Photography
I was so excited to get my magazine, The Unofficial Downton Abbey Knits 2014 issue of Piecework, in the mail this week; now I can tell you my secret. I designed the Lacy Tapered Jacket.

2 Comments

Happy Canada Day!

6/30/2014

1 Comment

 
Canada Day is here once again! The highway that passes in front is non-stop traffic as truck, cars, and motorhomes pass by. I am sure there are a fair share of holiday-ers and campers in the bunch, after all, this is a weekend devoted to camping, barbeques, and beaches.

But we'll be staying home, possibly eat too much, and watch the fireworks. I should be working on my sweater, but I've started another pair of mittens. With the weather warming up, the sweater is just too big and covers my lap now, while the mittens are smaller and cooler to work with.
Picture
The sweater is inside-out because I want to publish my pattern eventually. I've got about 5cm (2") to go until I get to the sleeves. Maybe I should just knuckle down and knit those couple of inches this Canada Day, then I'll be able to work on the sleeves this summer.

What projects do you have on your needles this summer?

Happy Canada Day!

~ Julie
1 Comment

Needle tatting

5/14/2014

0 Comments

 
Picture
I received my new issue of Piecework (May/June 2014) this week and it had an article on needle tatting. Well, I have tried tatting before and I just found myself in a tangle. Tatting is a fancy way of putting knots together on a string to make some pretty awesome lace (for those who haven't heard of it before).

Most times the pattern calls for a tatting shuttle, but in this case the article described using a simple needle to do the work. I found this WAY easier. For one thing, I usually make some of my increase stitches using a similar backwards-loop that needle tatting uses.

I also stumbled across a site while on
Pinterest that gave a picture tutorial of how to needle tat. It also has a few patterns near the bottom of the page for those who want to check them out.

Tomoko Morimoto has a new book out called New Tatting that I might just have to add to my collection.

0 Comments
<<Previous

    Julie Hamilton

    Julie is a farmer in beautiful Prince Edward Island, Canada. She loves knitting, spinning, and dying her own yarn.
    She decided to close Julie's Yarn Shoppe in 2020 and is now farming full-time.

    Archives

    May 2020
    April 2017
    April 2016
    March 2016
    December 2015
    January 2015
    September 2014
    June 2014
    May 2014
    October 2013
    December 2012
    October 2012
    July 2012
    May 2012
    March 2012
    February 2012

    Categories

    All
    5th Birthday
    After Thought Thumb
    After-thought Thumb
    Baby Blanket
    Butterfly Stitch
    Cables
    Cast-on
    Celebration
    Contest
    Crochet
    Eastern Method
    Fair Isle
    Fair-isle
    Free Patterns
    Frilly Scarves
    How To
    Knitting
    Magic Loop
    Mermaid
    Mitten
    Patterns
    Procrastination
    Scarves
    Stash
    Tatting
    Techniques
    Threaded Chain Cast-on
    Thumb
    Toe-up Knitting
    Top Down Knitting
    Top-down Knitting
    Yarn

    RSS Feed

Powered by Create your own unique website with customizable templates.